

Creating your first Angular 2 app
This post will help you get your first Angular 2 + TypeScript “hello world on asteroids” app out of the door. Please have a look on this post first if you are wondering why you should learn Angular 2 and TypeScript to begin with.
I used this tutorial, built by the Angular team and John Papa, to create this little app. Here is the repository for the app that we are going to investigate.
PS: Make sure you have NodeJS installed before continuing. If you are curious I am using Visual Studio Code on a Mac. :)
Installing the app (boring things first):
First clone this repository to you machine, then to run our app we will need to install TypeScript and a node package to host it. It is simpler than it sounds, you just need to run these two commands:
npm install -g live-server
npm install
live-server will let you host you app and add a live reload feature (sweet). That means that whenever you change a file your browser will be automatically refreshed with the new content.
The second command will install Angular 2 and TypeScript, which are the only dependencies specified in our package.json. If you don’t know what a package.json is you will need to learn a little bit more about NodeJS and specially NPM.
But don’t stress over this too much if you are new to the scene, for the purpose of this post you can abstract those technologies. :)
Hosting and compiling the app… Wait… Compiling?
Yes! We will need to compile our app to convert TypeScript into ES5 (same old JavaScript) code, otherwise browsers will not understand what we are creating. :) It is super simple to do it, just run this command:
npm run tsc
Then just host your app running:
npm start
Done! You should have your app running on the browser. At this stage the app already have ES5 JavaScript running in the browser instead of TypeScript.
As you are probably aware the commands we just ran are alias to the commands defined in the package.json file. Again, this topic is not the focus of this post :)
So… About the Angular 2 code:
Components:
Components are the main building blocks for an Angular 2 app. Instead of having a mix of directives, views, controllers and multiple scopes you will just have a tree of components.
Bellow is how you implement a component:
@Component({
    selector: 'little-component',
    template: `
        This is a nice little component :)
        <h1></h1>
        `
})
class LittleComponent {
    public title = 'Sweet!';
}
To define a component using Angular 2 we will need to create a class (feature from TypeScript) and decorate (feature from TypeScript) with the @Component annotation. Then our class will have our logic while the component annotation is going to define the Angular component. The annotation content reminds me a lot of how we used to create a Angular 1 directive definition. Interestingly annotations will probably be part of ES7.
Just to help you out, here is a quick comparison of Angular 1 and 2 concepts:
| Angular 1 | Angular 2 |
|---|---|
| App.js | Top level component |
| Directives | Component |
| Controller and a view | Component |
| Directive with a controller | Component |
Much simpler, right?
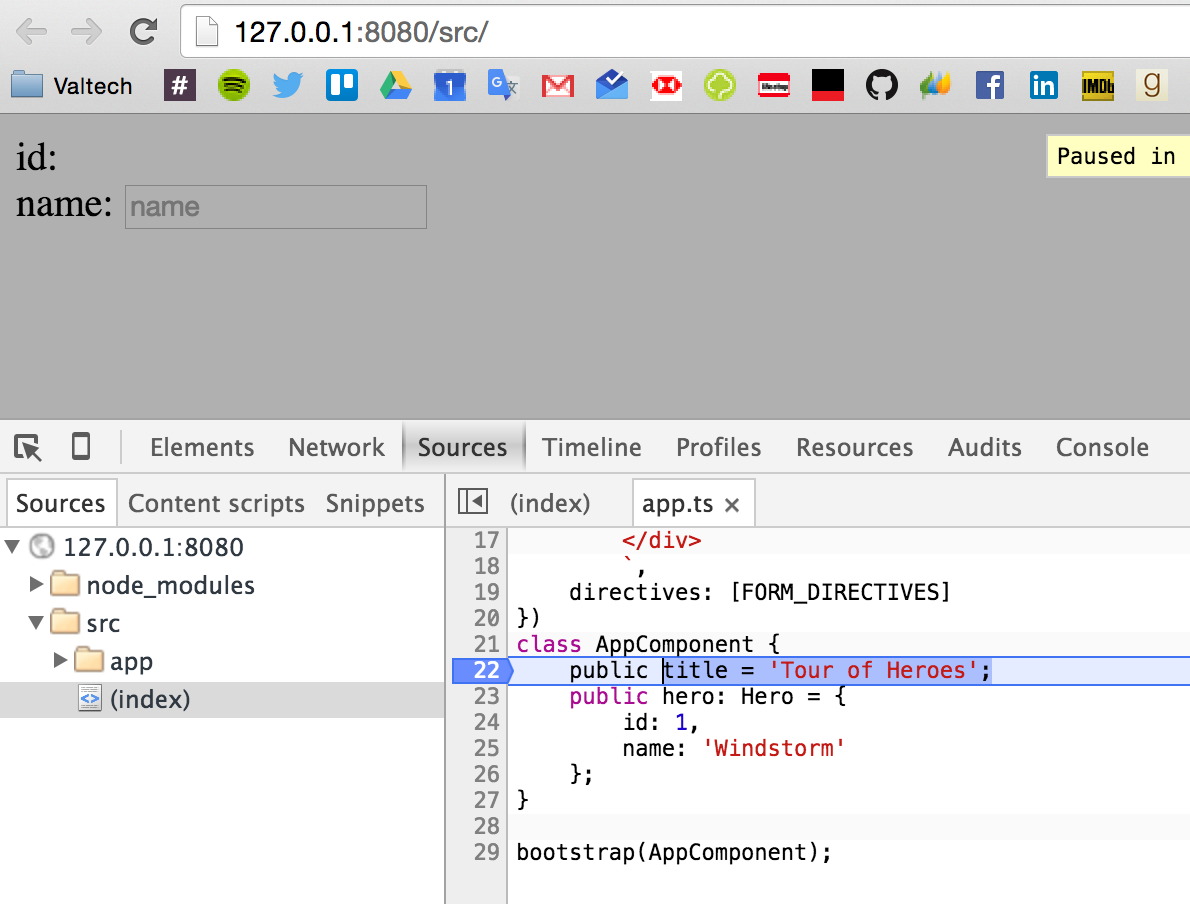
Ok, now lets have a look on the component from the repository:
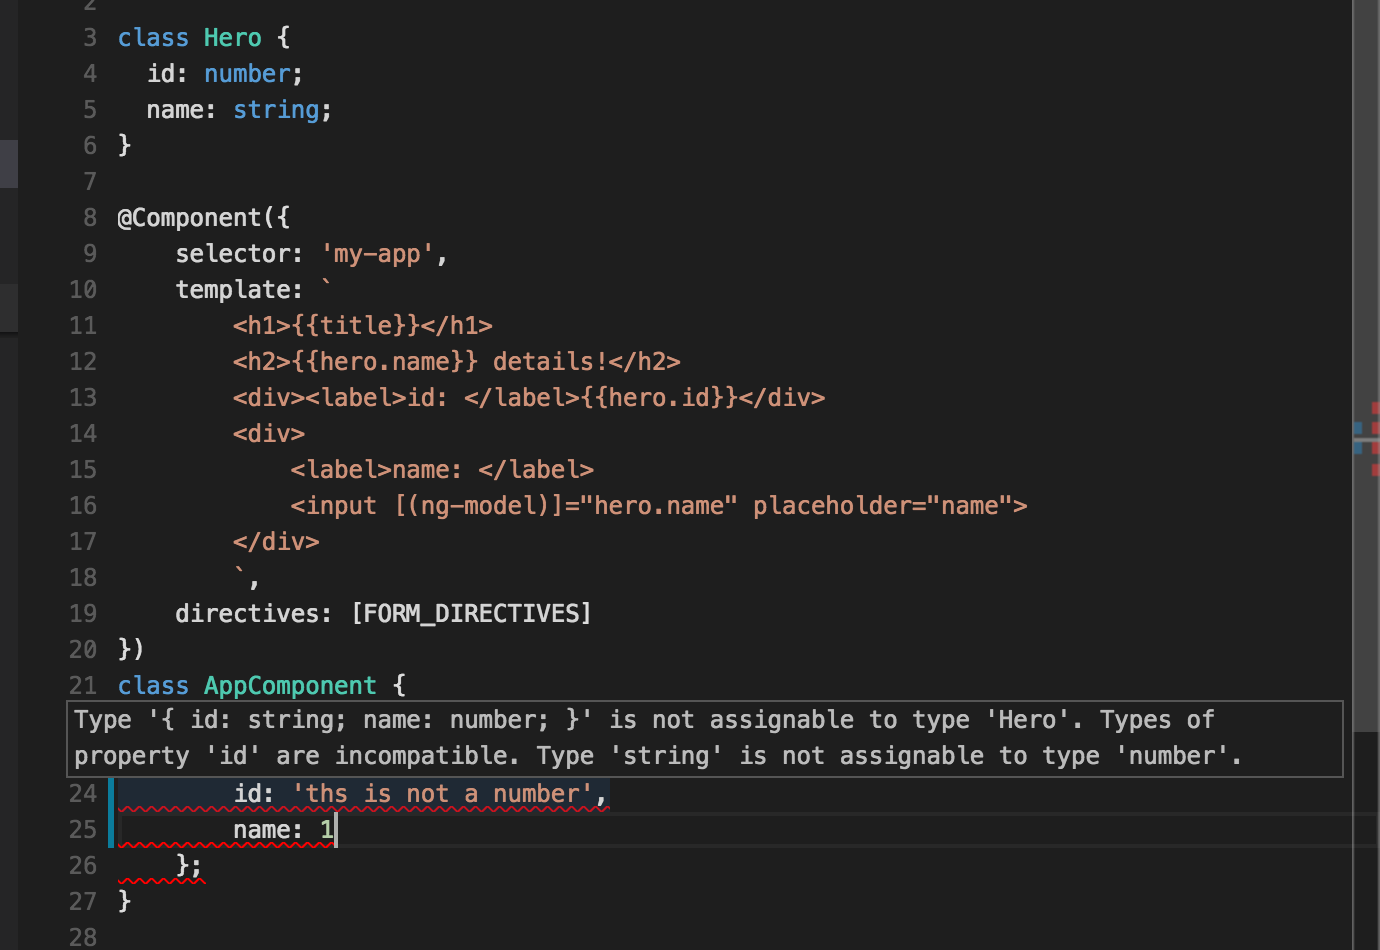
// Ignore this for now
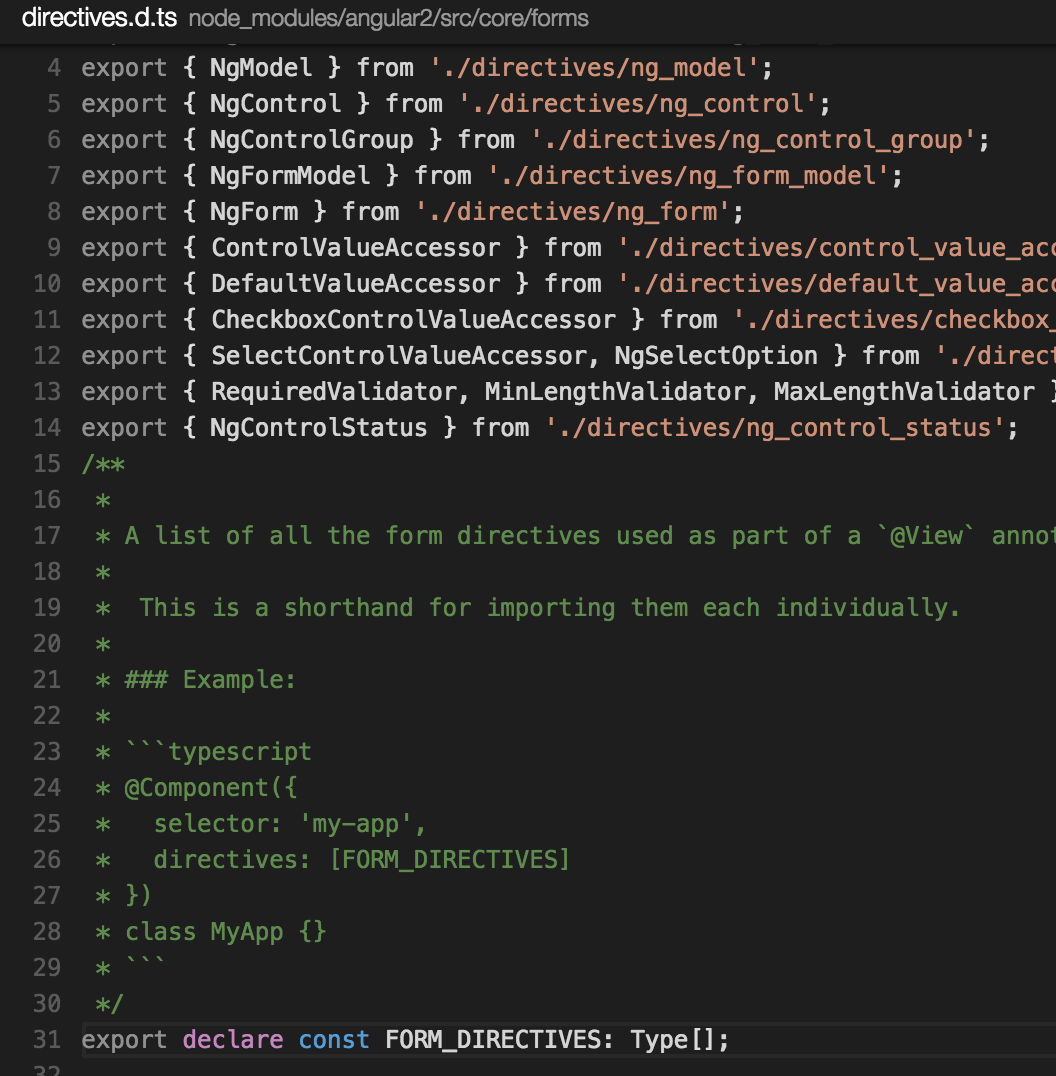
import {bootstrap, Component, FORM_DIRECTIVES} from 'angular2/angular2';
class Hero {
id: number;
name: string;
}
@Component({
selector: 'my-app',
template: `
<h1></h1>
<h2> details!</h2>
<div><label>id: </label></div>
<div>
<label>name: </label>
<input [(ng-model)]="hero.name" placeholder="name">
</div>
`,
directives: [FORM_DIRECTIVES]
})
class AppComponent {
public title = 'Tour of Heroes';
public hero: Hero = {
id: 1,
name: 'Windstorm'
};
}
// Ignore this for now
bootstrap(AppComponent);
Pay attention to the follow bits of code:
- Selector: This is how you are going to ‘activate’ your component in the html. In this case you can use the following in the HTML:
<my-app>
- Template: Quite easy, just the HTML that is going to be inserted when this component is used. You can also specify a templateUrl;
- Directives: Kind of a dependency injection. You have to pass an array with all the other components that you are going to use. The FORM_DIRECTIVES is an array of common components used in forms (duh). You have to add it if you want to use two-way data binding for example.
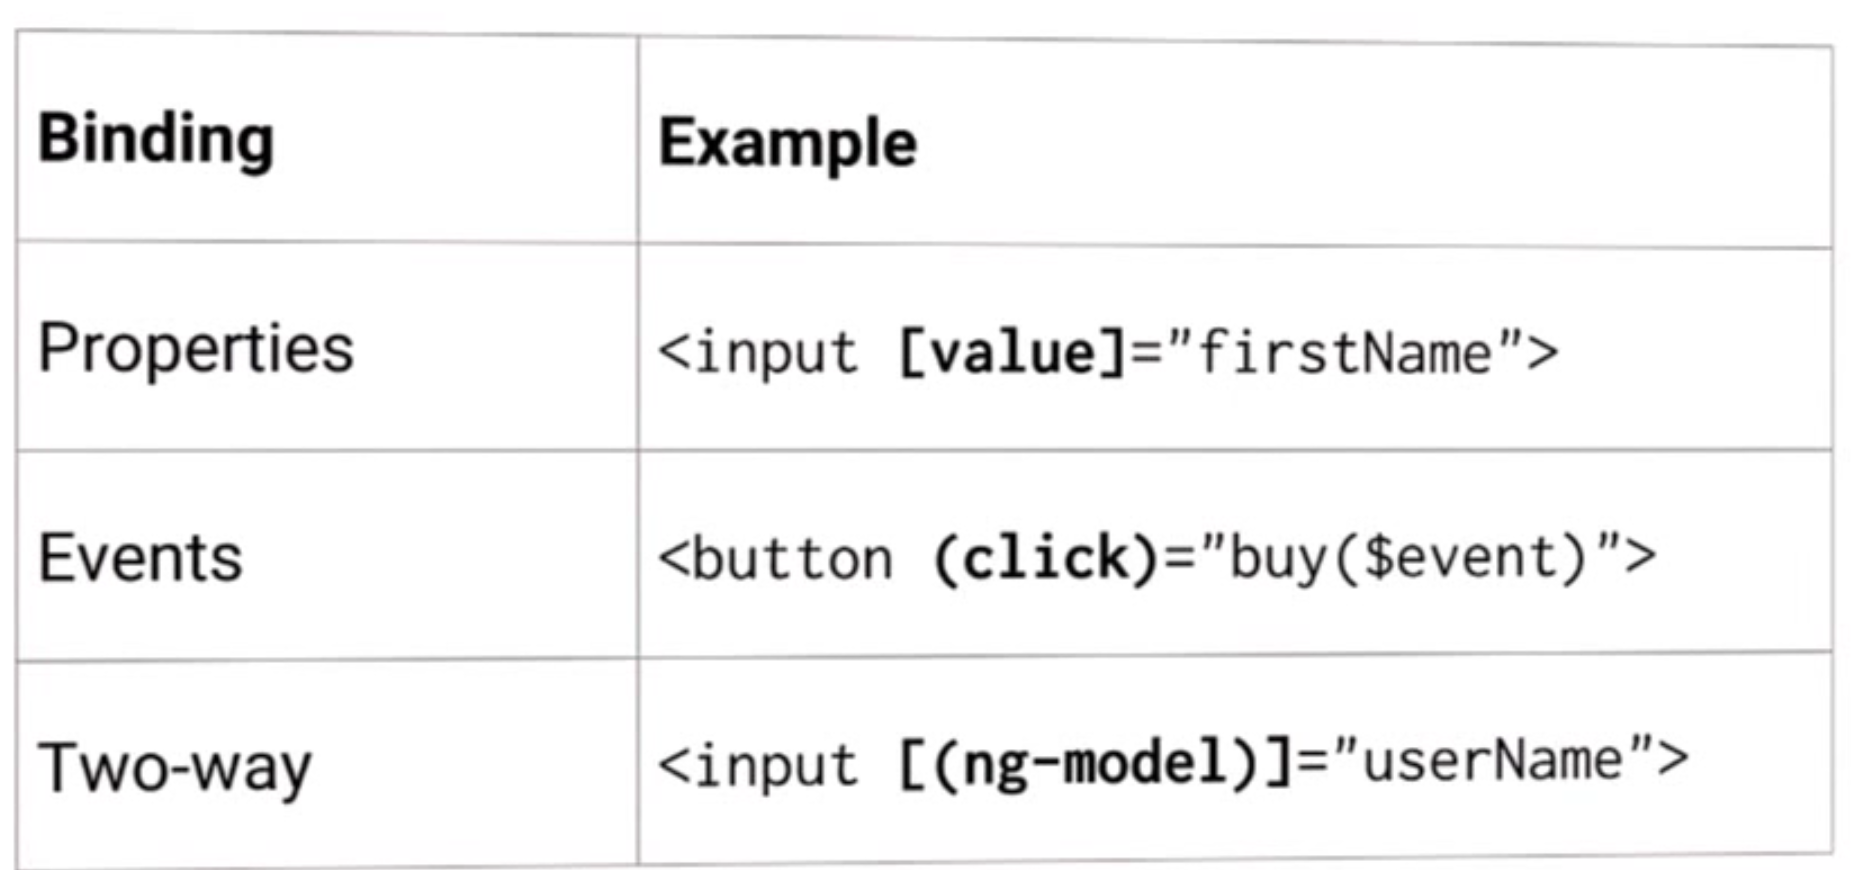
- [(ng-model)]: This is how you create two-way data binding now. In this case we are binding hero.name to the input;
- Typed language: Did you see how we reused the Hero class? Try to construct it with the wrong data and you will get a nice error :)
Dependency Injection:
As you probably realized, the first line from the example above is one of the new ways to use dependency injection (SystemJS). That makes Angular 2 much better than 1 in my opinion, to begin with we can reuse code much easier. The dream of reusing your models defined on the server is not that far away anymore.
import {bootstrap, Component, FORM_DIRECTIVES} from 'angular2/angular2';
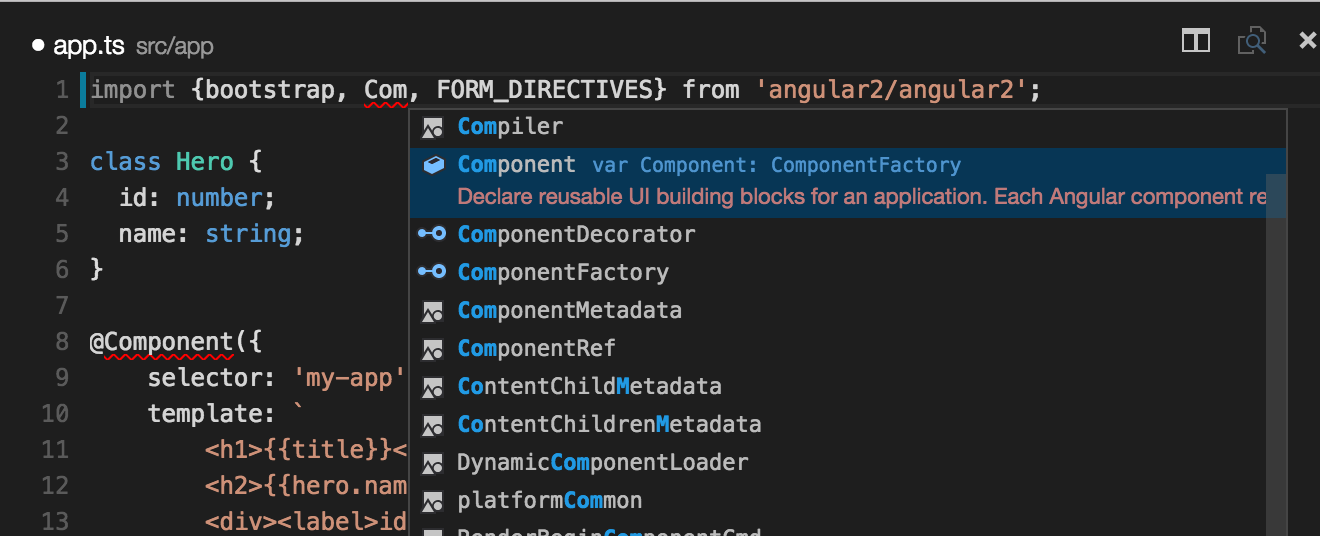
Another neat things is that with TypeScript you have autocomplete while typing the stuff inside the ‘import { ‘.
Templating:
As you saw the way to create a two-way data binding changed a little bit. The picture bellow shows how to bind to events and properties with Angular 2:
Wiring everything up:
You might wonder where is the old app.js which was responsible to configure and bootstrap your app. That is all going to be done in the root component now. That is why this code is executed at the bottom of the file. It is basically telling Angular that this is the root component.
bootstrap(AppComponent);
Now you can just go to the index.html and use it.
<html>
  <head>
    <title>Angular 2 QuickStart</title>
    <script src="../node_modules/systemjs/dist/system.src.js"></script>
    <script src="../node_modules/angular2/bundles/angular2.dev.js"></script>
    <script>
      System.config({
        packages: {'app': {defaultExtension: 'js'}}
      });
      System.import('app/app');
    </script>
  </head>
  <body>
    <my-app>Loading...</my-app>
  </body>
</html>
TypeScript coolness:
With this sample app you can already try some interesting advantages of using TypeScript to create your next app. Have a look on these neat features:
- Change the type of a property in a class and then assign a value from a different type to it === BOOM;
- You can autocomplete and check the documentation of what you are trying to use in the same way you can do today with languages like C#;
- You can even navigate to functions, for example in Visual Studio Code you can press ctrl and then click on it to see the code. With this, instead of going to the Angular 2 docs or any other library you can just jump to the relevant code from inside your IDE;
Angular 2, Ionic 2 and a bunch of other libraries are using TypeScript 100% of the time. The Angular team adopted it during Angular 2 development and reported a relevant improvement to their productivity. They said TypeScript made spotting errors and refactoring easier.
Debugging the code:
Last but not least it is important to know that you are still able to debug your apps in the same way you have always done. The compilation step already add the source maps needed to debug on any browser. That means that you can add breakpoints to your TypeScript files and it will work.
Final considerations:
We didn’t talk about how to prepare an app for deployment. Our code is generating the JavaScript files inside of the src folder. This is not ideal, but that is a topic for another post :)
I hope this was helpful for you! Let me know if you have any feedback on the commentaries.
Oh, have a look in my other post about Angular 2, you might become an expect in the field!

Cheers!